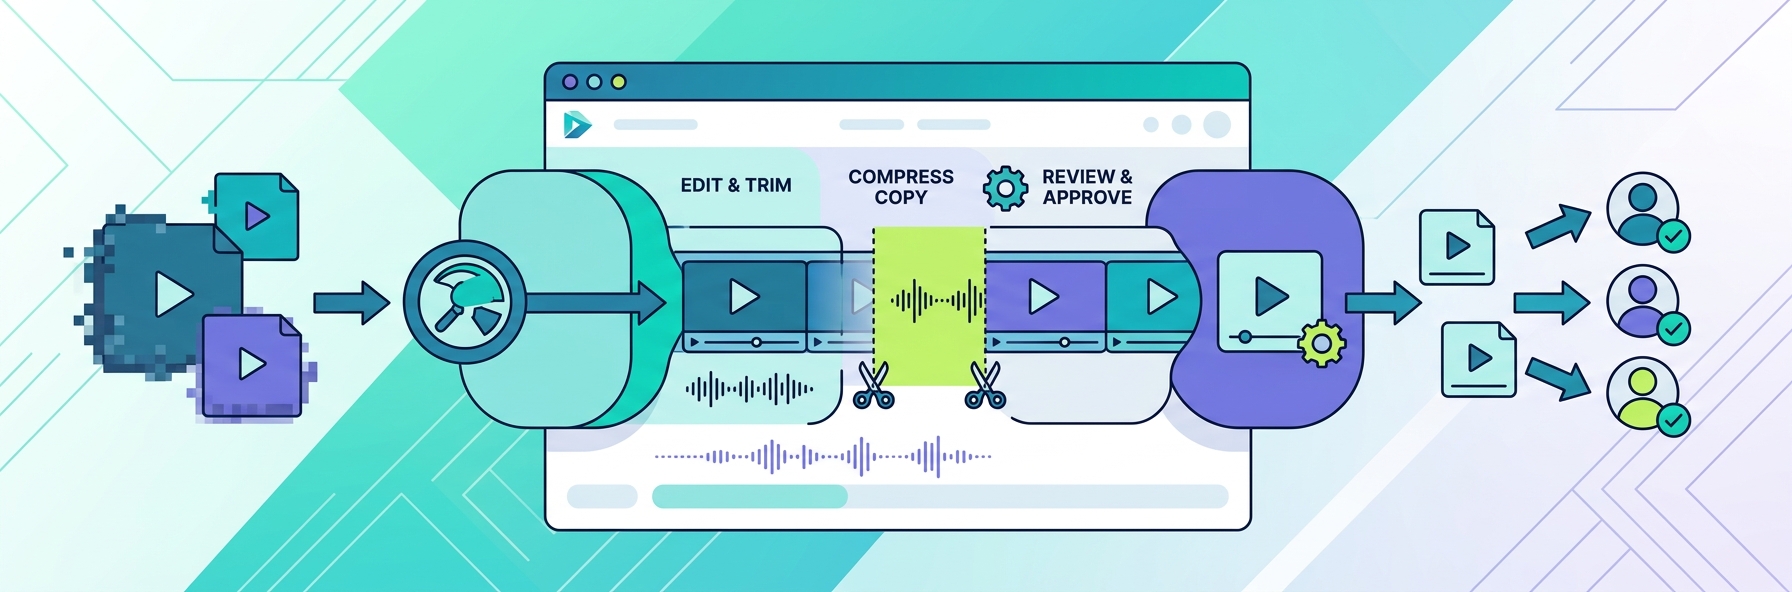
A collaborative workspace can fill up with video surprisingly quickly. The screen recording from the designer, the product demo video from the marketing department, the three versions of the presentation, the customer feedback video and a few short clips may all be waiting for approval. The problem is not simply that these files take up space. It’s that with each additional version, the project becomes more difficult to navigate through.
Compressing videos can help. Clideo, for example, provides an online way to reduce video size before it is shared with colleagues, clients, or collaborators. Compression is just one component of a better system though. What to do with each video when it enters the workflow, is the bigger question.
Not every video needs the same treatment
A good place to begin is to stop thinking of all video files as being of equal importance.
Think about the following four categories:
| Video type | Main priority |
|---|---|
Reference video |
Easy-to-use, straightforward playback. |
Working video |
Practical quality for review and feedback |
Presentation video |
Clear pictures and neat appearance. |
Master file |
Maintaining maximum usable quality |
A short screen recording showing a software bug may only need to be clear enough for another team member to identify the problem. The requirements of a final customer facing presentation are different.
This is important because there are multiple technical characteristics that are important for the quality of the video such as resolution, frame rate, bitrate, and codecs. Higher resolution often means larger file size, and lower output sizes when encoding may impact visual quality.
The goal, therefore, is not to create the smallest possible file. Its goal is to produce the smallest helpful file for the task.
Ask what the recipient actually needs
When adding a large video clip to a shared workspace, consider a few simple questions:
- Who needs to watch it?
- What should they look out for?
- Is this a draft or a final version?
- Should the recipient have the original quality?
- Is the video being watched for feedback or is it to be used again?
- Are there sections of the footage that are not necessary and could be cut off first?
These questions can prevent unnecessary file handling before compression even begins.
Picture a 45-second video demonstration of the actions of a website menu. The first 15 seconds may contain no useful information, so cutting that out can be more valuable than trying to compress the whole video more.
That is an important distinction. Edit first, compress second.
Give your workspace a video diet
Not all files are meant to be stored in a project.
A simple mechanism can be used to determine what goes into the active workspace.
1. Keep
- Approved videos
- Important source footage
- Current working versions
- Recordings with information that could be required later on
2. Compress
- Internal review copies
- Temporary demonstrations
- Draft presentations
- Short recordings that are mainly used for feedback purposes.
3. Archive or remove
- Superseded drafts
- Duplicate exports
- Accidental recordings
- Copies that are no longer needed
However, it’s not only about storage, it also creates decision fatigue, and wastes time. When colleagues open projects only to find 10 versions of the same video, finding the right copy to work with takes too many valuable hours.
An efficient workspace should make the work process easier and more streamlined, and not create hurdles on the way.
Reduce video size before the feedback cycle
Video also comes in handy when showing something is much easier than writing 2 paragraphs of text.
A designer can record a short walkthrough of a prototype. A programmer is able to show a flaw. A marketing manager can show exactly where a piece of copy appears on a page. A customer support specialist is capable of documenting a problem rather than attempting to explain each and every click.
However, these recordings are generally short-term communication aids.
A working practice is:
Record → Trim → Reduce video size → Upload → Review → Revise → Approve
If you’re using a review copy, you might not need the highest resolution. The important thing is that the people who are looking at it have access to the relevant details as well as the relevant audio.
The rule is simple: keep the main file, share the copy.
Do not compress away the information
There is one drawback to emphasising file size: the video may become smaller and less useful.
This is especially important for screen recordings and instructional videos.
Make sure to check before sharing a compressed version:
- Is small on screen text still readable?
- Are important interface elements distinguishable?
- Is speech still clear?
- Do diagrams and charts make sense?
- Has compression introduced distracting visual artifacts?
MDN notes that reducing video output size can have an impact on overall quality or introduce artifacts, depending on how the video is encoded.
There is also an accessibility question. The W3C guidance recommends a caption for prerecorded video that contains important audio information, and references transcripts and description of visual information as further accessibility measures based on the content.
So, the last test should NOT be: “Is the file smaller?”
It should be: “Is the information still intact?”
Make version names do some of the work
If people can’t know what version it is, then a smaller file isn’t much use.
Don’t use names such as finalvideo.mp4 or presentationnewfinal2.mp4, but use a simple structure:
Project + version + status.
For example:
- ProductDemo_V03_REVIEW
- ProductDemo_V04_APPROVED
- ProductDemo_V05_FINAL
This simplifies the scan of video libraries and decreases the likelihood of someone viewing an old file.
It also provides a convenient separation between the working material and the finished product. A compressed review copy can move through the collaboration process while the original master remains protected elsewhere.
Use video when seeing is faster than explaining
There is another side to efficient video management that has nothing to do with file size.
Sometimes video is simply the fastest way to communicate an idea.
Use a short recording when:
- It’s hard to explain a visual problem in words.
- Someone must show a series of actions.
- Feedback requires an interface/design.
- A team member needs to explain a process remotely.
- A customer issue is easier to reproduce than describe.
However, if you only need a simple factual update, a sentence could be better than a 2 minute recording.
The best collaborative workflow is therefore not the one containing the most video. It’s the one where video is used when it’s actually good for communication.
A 60 second video cleanup routine
Before adding a video to a shared project, check this list:
- Determine the target audience for the video.
- Decide what they actually need to see.
- Remove irrelevant footage.
- Select a suitable quality level.
- For the working copy, adjust the size of the video if maximum quality is not required.
- Check text, visuals, and audio.
- If necessary, add captions to the material.
- Use a version name for the file.
- Indicate if it is a draft, under review, or approved.
- Archive or remove obsolete versions.
The result is more than a smaller file. It is a cleaner visual workflow.
Video should make collaboration easier, not create another layer of file management. When teams distinguish masters from working copies, remove unnecessary versions, compress files according to their purpose, and preserve the information people actually need, visual content becomes much easier to manage from the first recording to final approval.
Published: October 12, 2026